Image beautifier in Python
To make a better reading experience for your audience, using images is one of the best ways. I intend to use this blog to write about my ideas. To document courses I have gone through. To report the technical problems I have faced. To clarify my points, sometimes, it is necessary to add images to my writing.
I want all the images displayed on the blog to be consistent. I want to add a background to all my images. And the process to do this needs to be as simple as possible. I don't want to go to my image processor every time I need to add an image.
So let's take a screenshot of a terminal and add a background to it. We are going to use Python and Pillow for this, so let's first import the library.
from PIL import Image
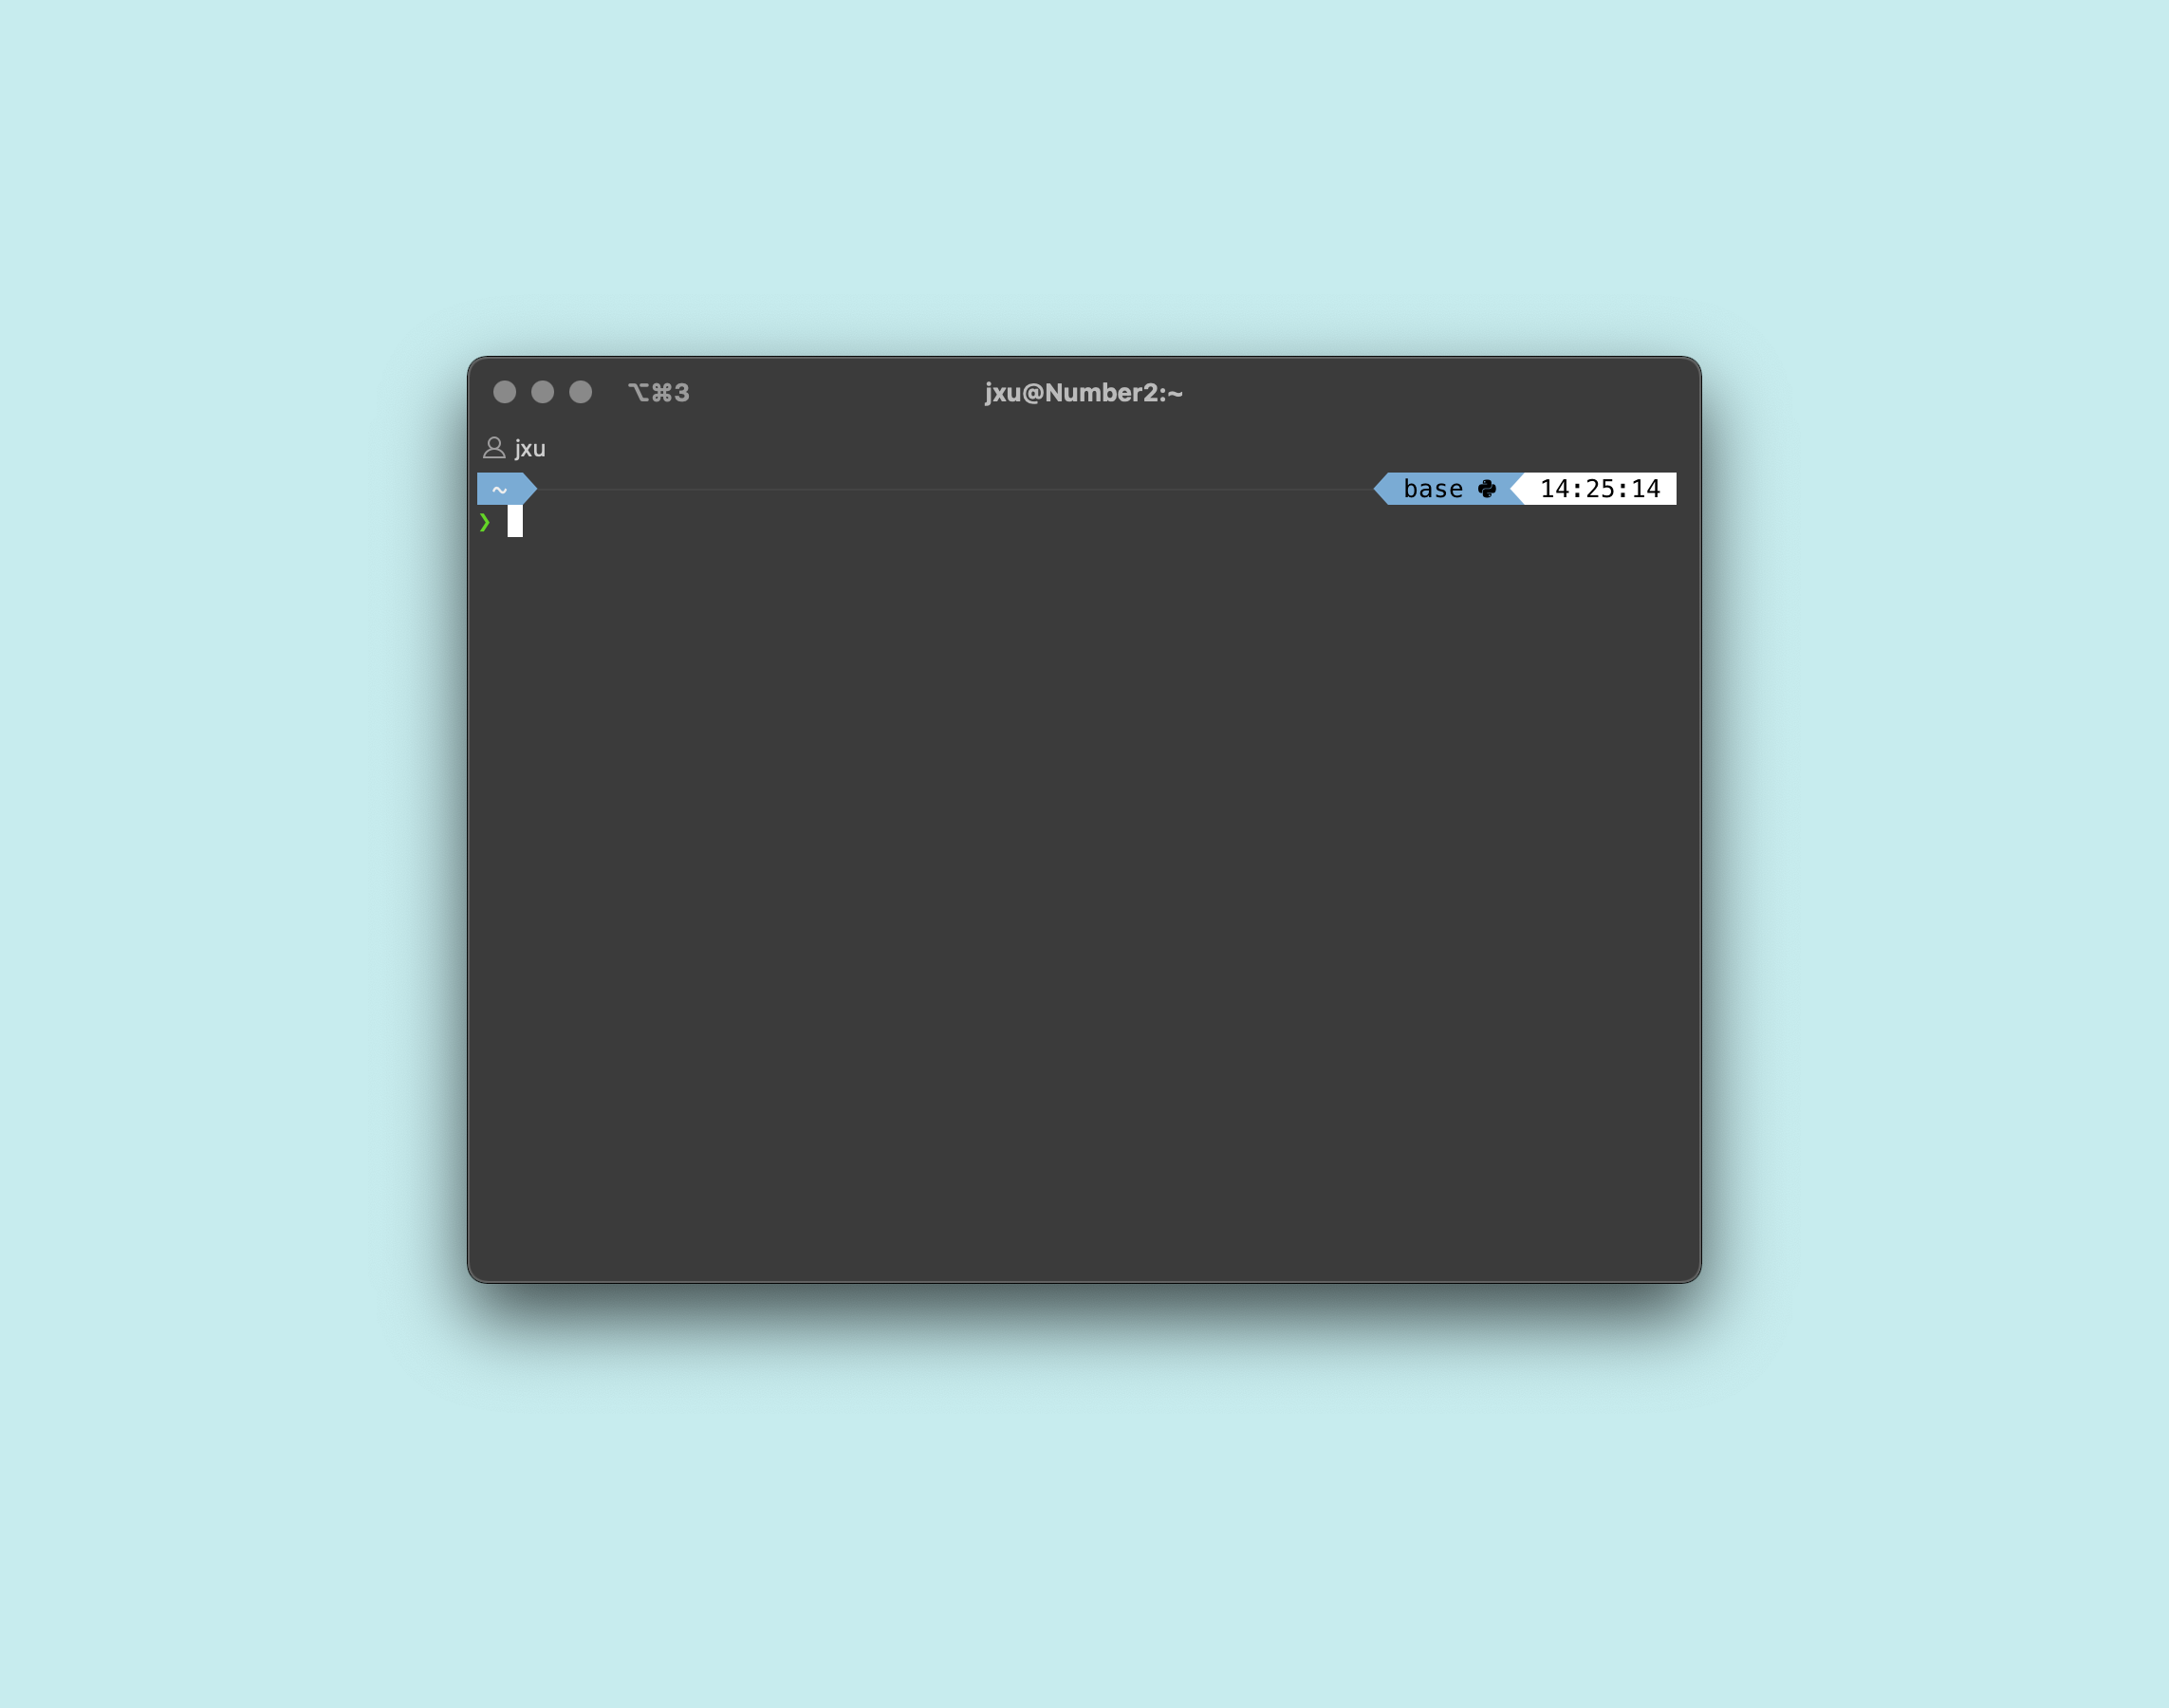
Let's open up the image I have using the library.
im = Image.open("terminal.png")
display(im)

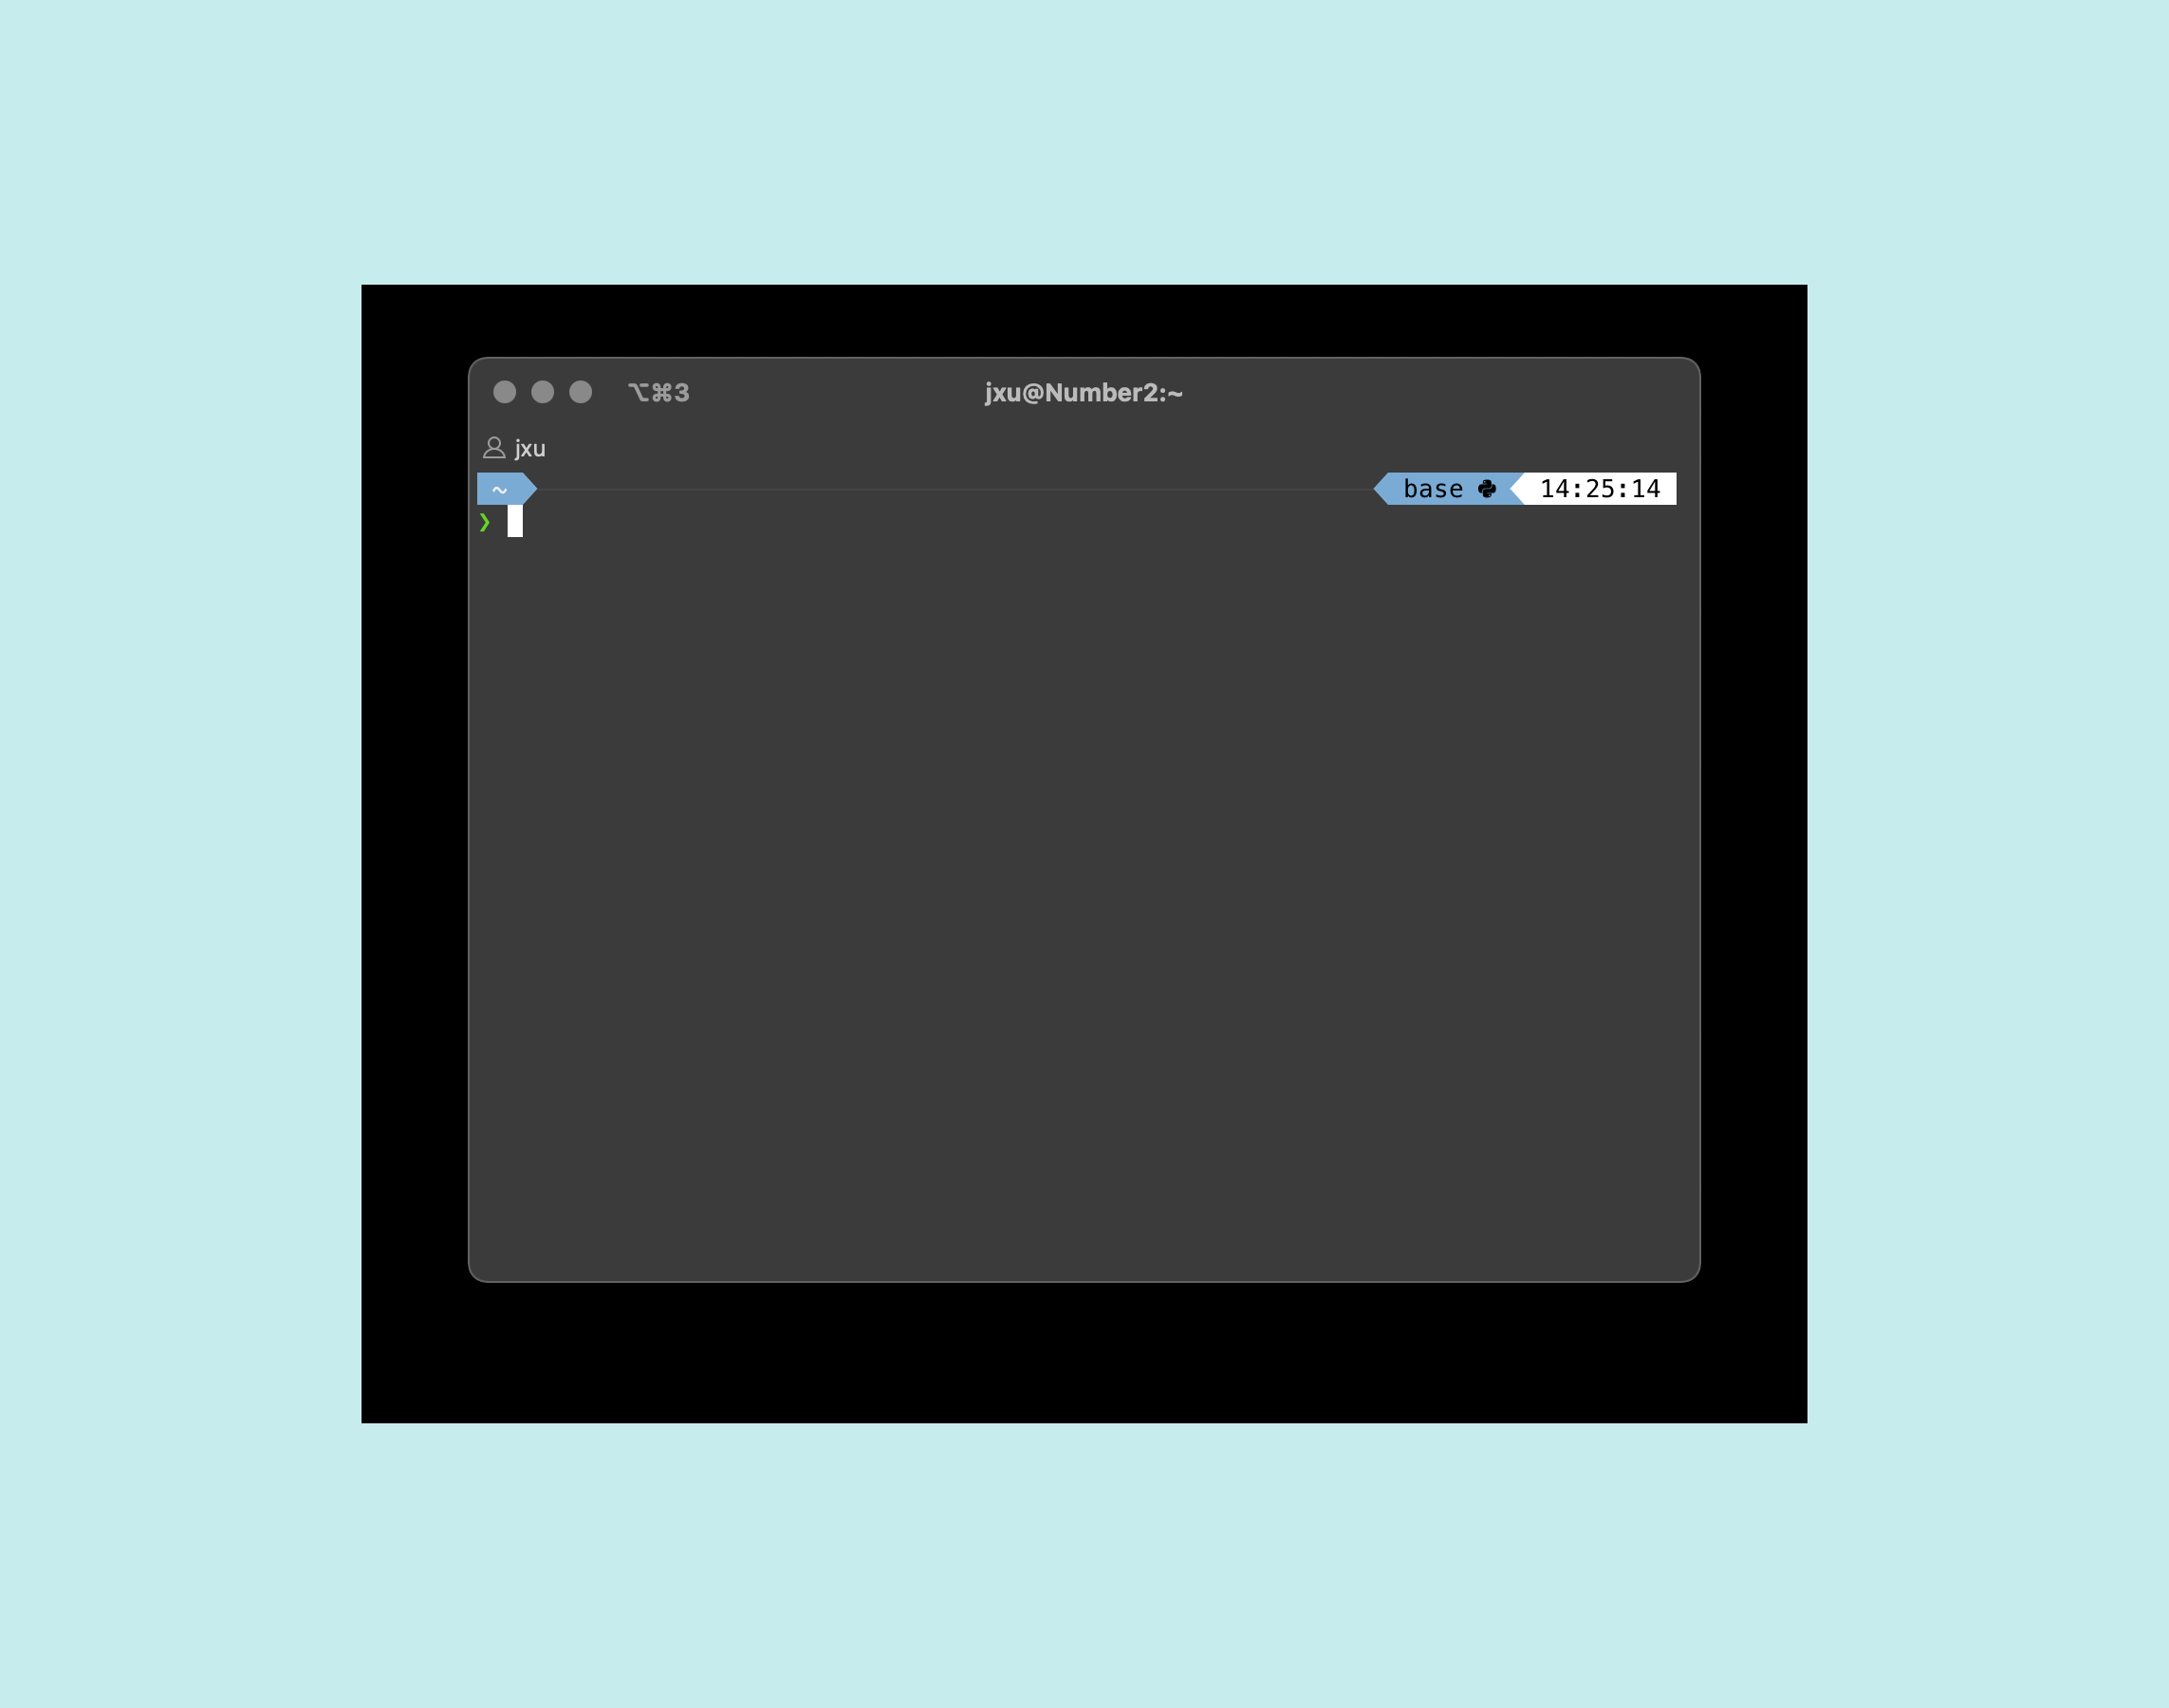
Now let's add a background to this image. To do that, we need to create a new image and paste our screenshot image. I will make an image where the size is 50% larger than the original width and height. And calculate an offset, so our screenshot is placed right in the middle.
def generate_ss(im):
    # Get the current image size
    img_width, img_height = im.size

    # Make new size with 50% more for the width and height
    bg_size = (img_width + (img_width // 2),
               img_height + (img_height // 2))

    # Calculate offset
    offset = ((bg_size[0] - img_width) // 2,
              (bg_size[1] - img_height) // 2)

    im_with_bg = Image.new("RGB", bg_size, "#c7ecee")
    im_with_bg.paste(im, offset, mask=im)

    return im_with_bg
new_img = generate_ss(im)
display(new_img)
A note about im_with_bg.paste(im, offset, mask=im) line. When you take a screenshot on your Mac to capture a window (using Command+Shift+4 and Space bar), you got an image that has a drop shadow and transparency on the surrounding box. If we don't use the mask keyword, the image will show up with a black box surrounding the image. You can see the black box because the image has transparency. And what we want is to create a composite image that blends the background and our image. That is why we need to use the mask keyword. Let me show you what it will look like if we don't use the mask keyword.
bg_size = (im.size[0] + (im.size[0] // 2),
           im.size[1] + (im.size[1] // 2))
offset = ((bg_size[0] - im.size[0]) // 2,
          (bg_size[1] - im.size[1]) // 2)
im_with_bg = Image.new("RGB", bg_size, "#c7ecee")
im_with_bg.paste(im, offset)
display(im_with_bg)
This is not what we want.
Adding a drop shadow
So the previous image comes with a drop shadow. Which makes it looks nice. Naturally, you ask, what if we want to add a drop shadow for pictures that do not come with one.
It turns out someone already made a function for this. You can find the drop shadow function here. The original recipe does not allow for the shadow color to have transparency. Here I tweak the function a bit to add that ability.
from PIL import ImageFilter


def drop_shadow(image, offset=(5,5), background=0xffffff, shadow=0x444444,
                border=8, iterations=3):
    """
    Add a gaussian blur drop shadow to an image.
    image       - The image to overlay on top of the shadow.
    offset      - Offset of the shadow from the image as an (x,y) tuple.
                  Can be positive or negative.
    background  - Background colour behind the image.
    shadow      - Shadow colour (darkness).
    border      - Width of the border around the image.  This must be wide
                enough to account for the blurring of the shadow.
    iterations  - Number of times to apply the filter.  More iterations
                produce a more blurred shadow, but increase processing time.
    """
    # Create the backdrop image -- a box in the background colour with a
    # shadow on it.
    totalWidth = image.size[0] + abs(offset[0]) + 2*border
    totalHeight = image.size[1] + abs(offset[1]) + 2*border
    back = Image.new("RGBA", (totalWidth, totalHeight), background)
    # Place the shadow, taking into account the offset from the image
    shadowLeft = border + max(offset[0], 0)
    shadowTop = border + max(offset[1], 0)
    back.paste(shadow, [shadowLeft, shadowTop, shadowLeft + image.size[0],
               shadowTop + image.size[1]] )
    # Apply the filter to blur the edges of the shadow.  Since a small kernel
    # is used, the filter must be applied repeatedly to get a decent blur.
    n = 0
    while n < iterations:
        back = back.filter(ImageFilter.BLUR)
        n += 1
    # Paste the input image onto the shadow backdrop
    imageLeft = border - min(offset[0], 0)
    imageTop = border - min(offset[1], 0)
    back.paste(image, (imageLeft, imageTop))
    return back
Now let's modify our generate_ss function.
def generate_ss(im, bg_color, **kwargs):
    # Get the current image size
    img_width, img_height = im.size

    # Make new image with 50% more for the width and height
    bg_size = (img_width + (img_width // 2),
               img_height + (img_height // 2))

    # Apply drop shadow
    shadow_settings = kwargs.get("shadow", {})
    img_shadow = drop_shadow(im, background=bg_color,
                             **shadow_settings)

    # Calculate offset
    new_img_width, new_img_height = img_shadow.size
    offset = ((bg_size[0] - new_img_width) // 2,
              (bg_size[1] - new_img_height) // 2)

    im_with_bg = Image.new("RGB", bg_size, bg_color)
    im_with_bg.paste(img_shadow, offset, mask=img_shadow)

    return im_with_bg
Okay, the function is ready. It is time to find a suitable parameter for the drop shadow. After trying multiple times, I found the setup that works.
shadow_setup = {
    "offset": (2, 8),
    "border": 68,
    "shadow": (0, 0, 0, 50),
    "iterations": 60
}

book_cover = Image.open("book.jpeg")
new_im = generate_ss(book_cover, "#c7ecee", shadow=shadow_setup)
display(new_im)

Summary
This article shows how easy it is to add background and drop shadow to images or screenshots you take using Python. In practice, I turn the code above into a command-line script. So every time I need to add pictures to my posts, I run this command, and I got a beautiful screenshot.